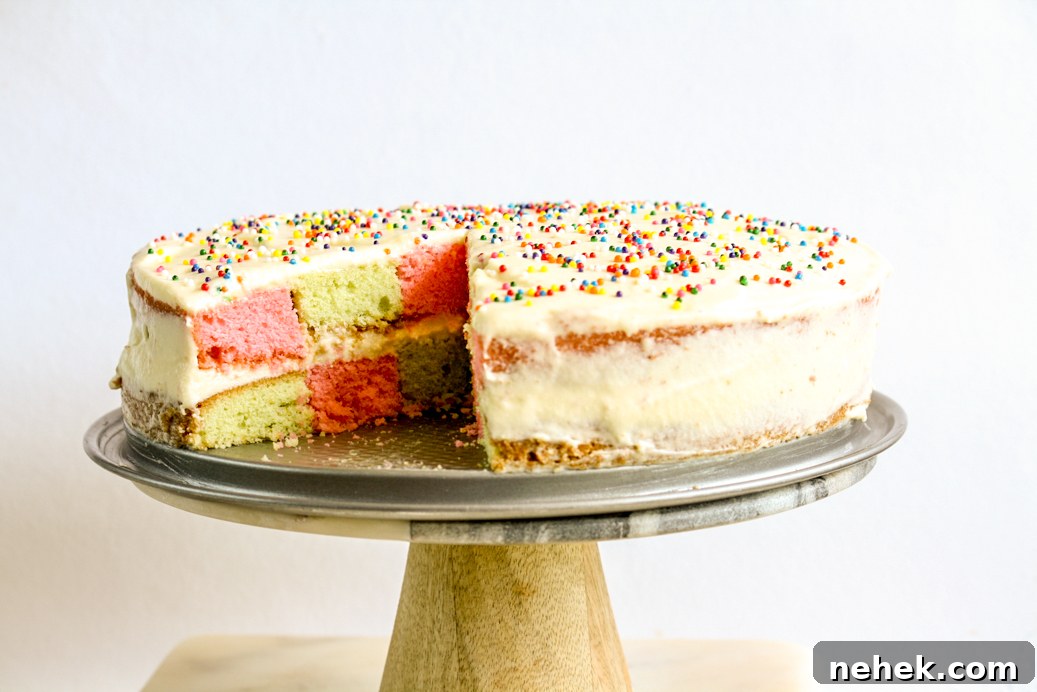
It may seem early to plan a weekend bake, but this checkerboard cake is worth scheduling. A classic vanilla butter cake, dyed two colors (pink and green here, but use any colors you like), is cut and reassembled to form a striking checkerboard pattern. The layers are filled and covered with a light, tangy cream cheese frosting. The result is sturdy enough to slice neatly, tender to eat, and very fun to serve.
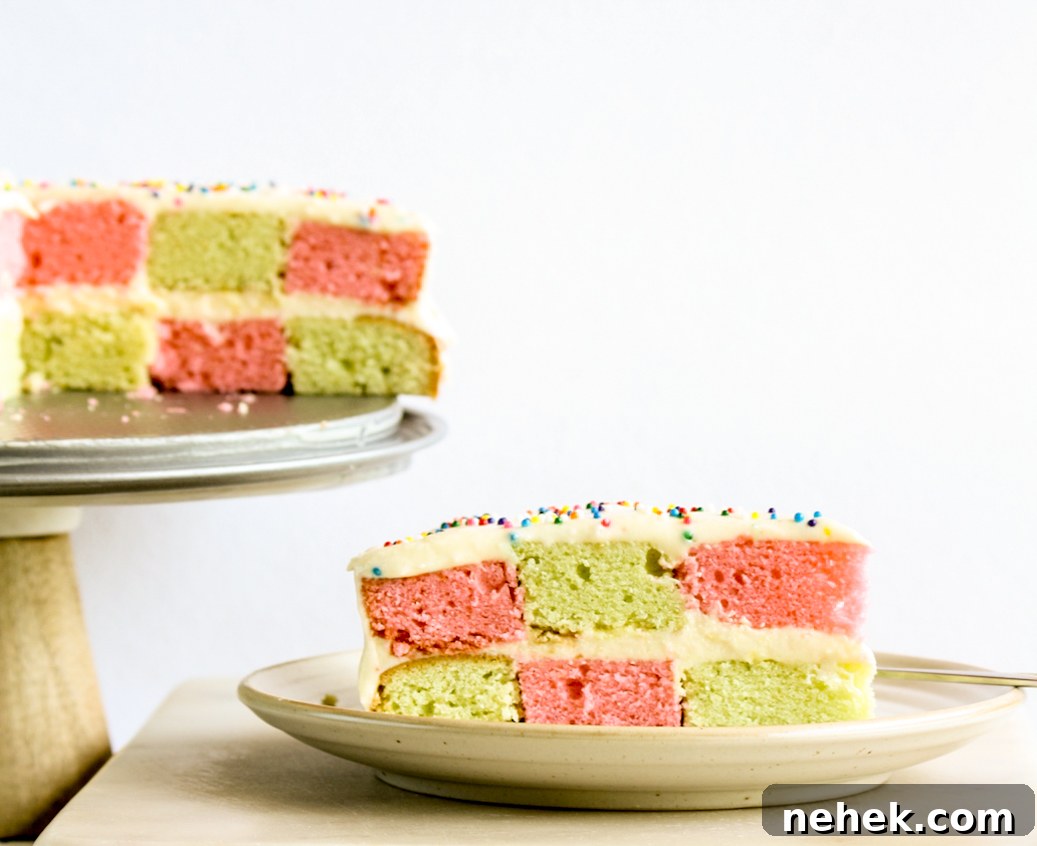
This recipe uses a simple butter cake batter that holds up well to the cutting and reassembly process. I baked one batter at a time in a single 9-inch springform tin, which works especially well in smaller ovens that cannot fit multiple tins. I baked two separate cakes—one colored pink, one colored green—and then cut concentric circles from each to create the checkerboard effect when stacked. While I made a two-layer cake for convenience, you can double the batter and make a four-layer version if you prefer more height and drama.
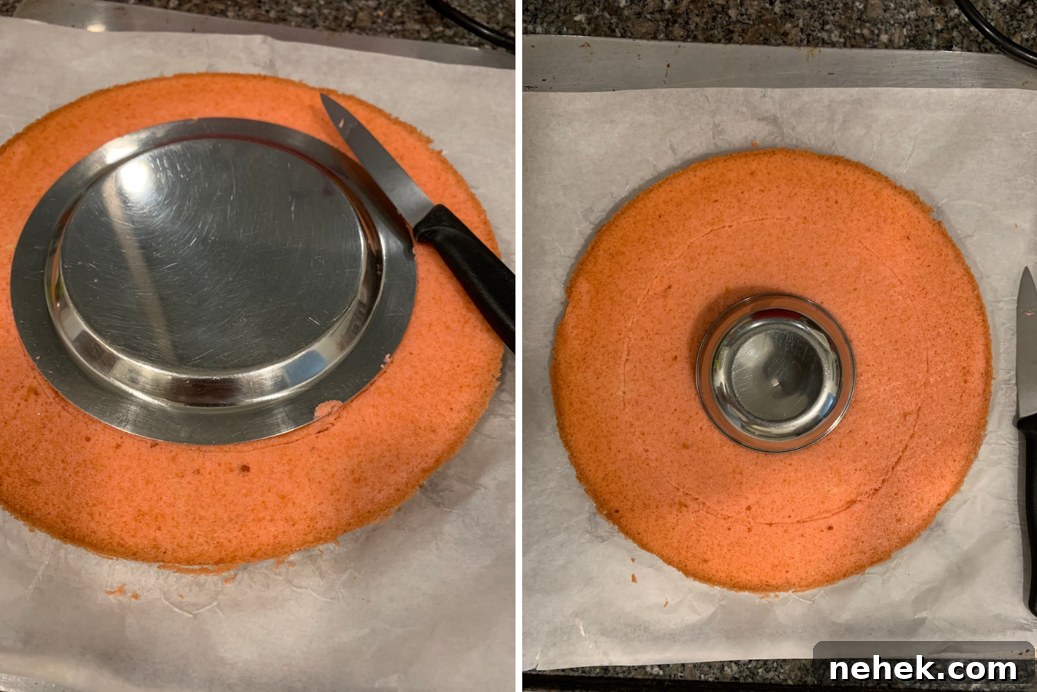
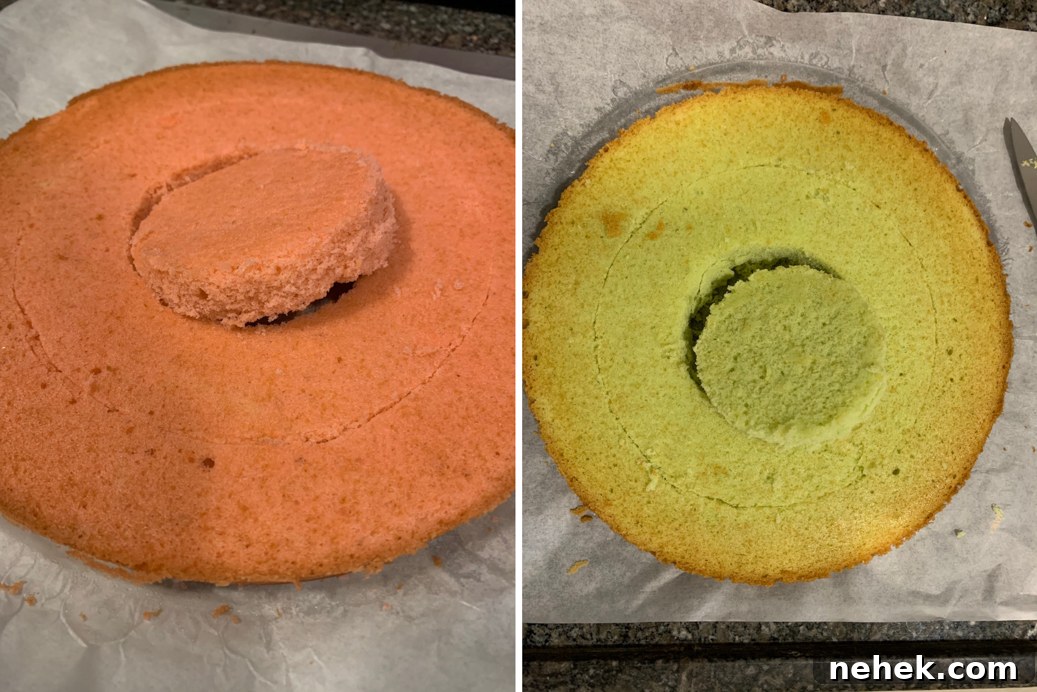
The assembly takes a little patience but is not difficult. Each cake is trimmed flat, then cut into three concentric rings—outer, middle, and center—using a 6-inch plate and a 3-inch bowl as guides. The rings from one color are swapped with the rings from the other color so each layer contains alternating colors. A tight fit between rings is essential to produce clean, even checks when the cake is sliced, so take your time when levelling and cutting.
Please read the recipe notes before beginning.
Checkerboard Cake
Ingredients
For the pink cake
- 1/2 cup caster sugar (95 g)
- 100 g butter, room temperature
- 2 eggs, room temperature
- 1 tsp vanilla extract
- 1 cup all-purpose flour (120 g)
- 1 tsp baking powder
- 1/4 tsp salt (if using unsalted butter)
- 2–3 drops pink gel food color
For the green cake
- 1/2 cup caster sugar (95 g)
- 100 g butter, room temperature
- 2 eggs, room temperature
- 1 tsp vanilla extract
- 1 cup all-purpose flour (120 g)
- 1 tsp baking powder
- 1/4 tsp salt (if using unsalted butter)
- 2–3 drops green gel food color
For the frosting
- 250 g cream cheese, room temperature
- 100 g butter, room temperature
- 1/4 tsp vanilla extract
- 3/4 to 1 cup icing sugar, sifted (115 g)
Instructions
- Make one batter at a time unless your oven fits two tins. Line a 9-inch springform tin with non-stick baking paper and lightly grease the sides. This makes removing the cake easy. If you use a regular round tin, line the sides with paper or be prepared to invert the cake after cooling.
- Make the pink cake: preheat the oven to 175°C. Beat butter and sugar on medium speed until pale and fluffy. Add eggs one at a time, beating slowly after each addition, then stir in vanilla.
- Sift in flour, baking powder, and salt, folding gently to combine. Stir in the pink food color until evenly blended. The batter will be thick but spreadable; add a tablespoon of milk if it needs loosening.
- Spoon the batter into the prepared tin and smooth the top. Bake 25–30 minutes, rotating halfway through so it browns evenly. A toothpick inserted in the center should come out clean.
- Cool the cake at room temperature for 20 minutes, then lift it from the tin using the paper and transfer to a wire rack to cool completely.
- Repeat the same process to make the green cake, using green food color.
- Once cooled, chill both cakes in the refrigerator for 1 hour. This firms them up and makes cutting and assembling much easier.
- Make the frosting: beat cream cheese and butter until smooth, add vanilla, then beat in the icing sugar until you have a creamy, spreadable frosting. If your kitchen is warm, chill the frosting briefly to firm it for spreading.
- Level the tops of both cakes if needed. Working with one cake at a time still on its paper, place a 6-inch plate in the center and cut around it. Remove the plate and cut again to ensure the circle is fully separated. Then place a 3-inch bowl inside the 6-inch circle and cut the inner circle. Gently push out the center circle, then the middle ring, leaving three concentric rings.
- Repeat the cutting process with the second cake. If the rings are difficult to separate, chill the cake for 15 minutes and try again.
- Assemble the first layer on your serving base: outer ring from one color, 6-inch ring from the other color, then the 3-inch center of the first color. Press rings together so they fit snugly. Spread a thin layer of frosting (less than half the frosting) over this layer.
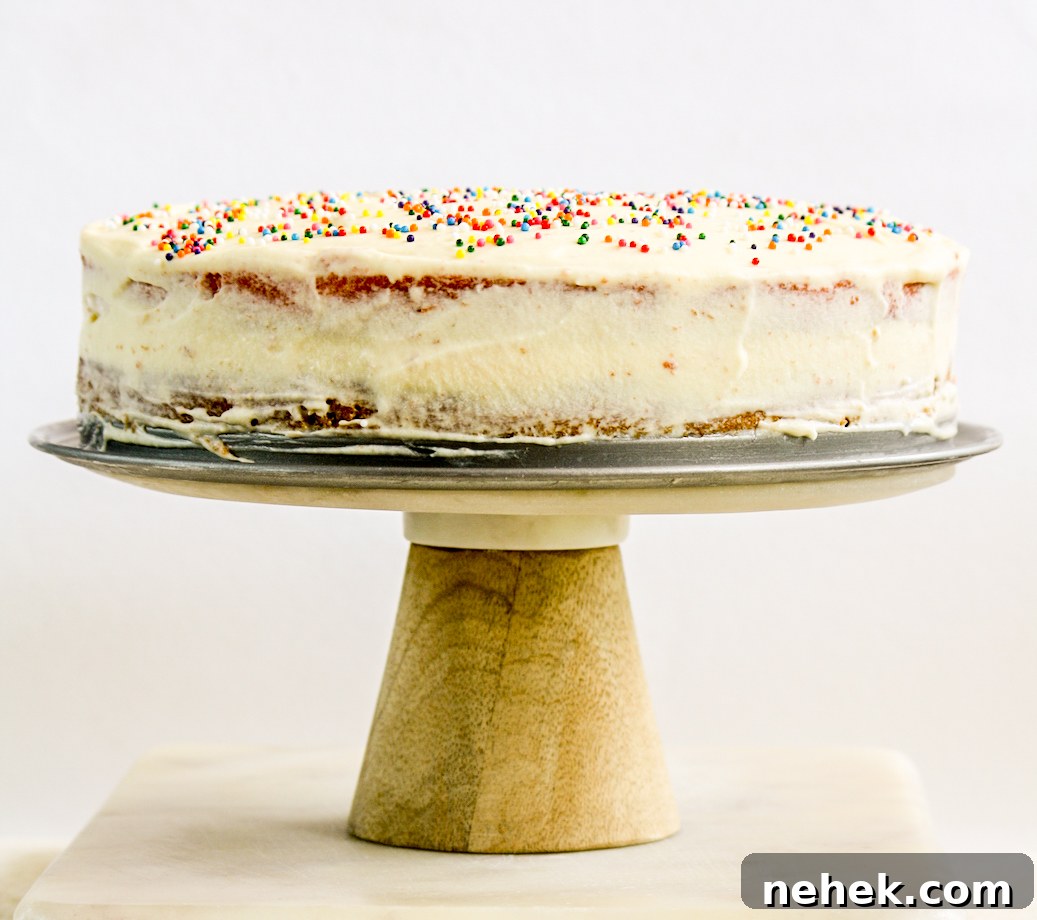
- Place the second layer using the alternate arrangement of rings so the checkerboard pattern forms when sliced. Cover the cake with the remaining frosting, smoothing the top and sides with a spatula. Decorate with sprinkles if desired.
- Chill the assembled cake for at least 30 minutes to set the frosting. For the best texture, allow slices to come to room temperature for about an hour before serving. Store the cake in the refrigerator for up to 5–6 days, or freeze for longer storage.
Notes
You can color only one batter and leave the other natural if you prefer a subtler look. Gel food colors are more concentrated than liquid colors; if using liquid color you may need about 1 tsp instead of a few drops of gel.
This recipe is written for one 9-inch tin. If your oven fits two tins, you can prepare both batters at once, divide them into two bowls to color, and bake simultaneously. For a four-layer cake, double each batter and slice each baked cake into two layers; double the frosting as well.
Cook time is per cake when baking one at a time. Prep time does not include cooling and chilling.
Enjoy baking and have fun with the colors and presentation!